W5TSU

Making Amature Radio Connections

Welcome

Hello, my name is Mark (W5TSU). I started amateur radio as KD5AMB (tech) on 02/21/2007 and I hold a general class license. (Working on my Extra.:)

I love electronics and Amature Radio. This website, is my way of keeping notes and sharing with others. If you want to ask questions you can email me at w5tsu @ grennan.com.

I’m currently helping with the M17 project (M17Project.org). M17 is a community of open source developers and radio enthusiasts. We’re building understandable systems in support of the hackers and experimenters’ history of ham radio.

Arrow Loop Antenna

I’m going to create a delta loop antena made from arrow shafts. I believe this should be good match from 40 to the 10 meeter band. This will include 3D printed parts for antenna mounts and for a matching coil.

Digipeater

I’ve build a Digipeater. These are my notes.

Equpment

Using DigiPi, Digirig, and a handheld I had not used.

DigiPi runs on RaspberryPi. I’m using a Pi4 with a Geekworm for Raspberry Pi UPS - X729 for grater uptime and 12 Volt support.

DigiPi is a great progject developed my Craiger (KM6LYM. This project is using version 1.8.1. You can plug it into your radio’s USB interface, use a radio interface like DigiRig, or use a sound card with your radio in VOX mode, to run many digital modes.

DigiRig is a sound and rig control serial port interface in one. You can send sound data and control you rig’s PTT.

Direwolf and DigiRig configuration

Download the DigiPi image. You will need to give Craiger a dollar to get access to the image. Burn it to an SD Card and boot the Pi. Use your browser to connect and configure DigiPi. This is all documented on the DigiPi page.

The DigiPi will boot into Access Point mode. Connect to this network and browse to 10.0.0.5. You should start with “initialize” to add your Call Sign, Latatude, Longatude and Grid Square. You can then choise “Shell” menu option or SSH to login-in. The USER is pi and the PASSWORD is raspberry. Next run sudo remount and/or you may need to run sudo systemctl daemon-reload.

Use the menu option Wifi to configure Wifi and other Raspberry Pi settings.

Edit /etc/systemd/system/digipi-boot.service to change the default mode to DigiPeater. Change the ExecStart line to ExecStart=systemctl start digipeater then re-run sudo systemctl daemon-reload.

To find the USB name of the DigiRig use ls -l /dev/serial/by-id | grep CP2102. The name will be ttyUSB# at the end of the output.

To find the ADEVICE setting use arecord -l. Look for the “USB PnP Sound Device”. You’ll need its card #: and device #: to create ADVICE plughw:#:#.

Now edit /home/pi/direwolf.digipeater.conf and update these lines.

# DigiPi Digipeater configuration file template
# This configuration makes you a WIDE1-1 Digi
# and forwards text messages to nearby targets over RF

# APRS server we connect to
# Do not use T2QUEBEC nor DALLAS, often ignore filters
IGSERVER noam.aprs2.net

# Login for APRS server
IGLOGIN W5TSU-10 9604

# Our info
MYCALL W5TSU-10

# put us on aprs.fi map via internet
# change sendto=IG to sendto=RF to send beacons over RF
PBEACON sendto=IG compress=1 delay=00:10 every=30:00 symbol="digi" overlay=R lat=35.53333 long=-97.62111 comment=" contact mark@w5tsu.net "

# routing table
DIGIPEAT 0 0 ^WIDE[5-7]-[1-7]$ ^WIDE[1-4]-[1-4]$

# Digipath from Internet 
IGTXVIA 0,WIDE1-1,WIDE2-1

# Don't digipeat our self - RF -> RF filter
FILTER 0 0 ! d/W5TUS-10 & ! b/W5TSU-10

# Internet -> RF filter - local filter
FILTER IG 0 ( t/m & ! g/BLN* )

# Internet -> RF filter - server-side filter
IGFILTER t/m/W5TSU-10/100

# Limit number of packets
IGTXLIMIT 20 80

# DigiRig serial interface
PTT /dev/ttyUSB0 RTS

MODEM 1200

DWAIT 0
TXDELAY 30
TXTAIL 10

AGWPORT 8000
KISSPORT 8001

# DigiRig USB card:
ADEVICE plughw:0,0

Reboot, connect your radio and test.

73

Author image

Notes on JS8Call

My best friend KX0U invited me to JS8Call. This is my project to get there. OH, and thanks Jim!

Equpment

Starting from the computer end, I’m using [Dragon OS] (https://sourceforge.net/p/dragonos-focal/wiki/OriginStory/). More on it latter.

The computer is connected to a Xiegu DE19 interface. I tried using a DigiRig with much frustration. More on that latter.

The Radio is a Xiegu G90 controled by flrig. JS8Call is connected to flrig.

My antenna varies between DX-Comander virtical and # QRPGuys Portable No Tune End Fed Half Wave Antenna.

Dragon OS

I can not say enough good things about Dragon OS. It’s a Linux distribution with a comprehensive suite of pre-installed SDR software tools with support for many of the most popular and accessible SDR radios. It has image installs for X86 and Raspberry Pi and is based on Lubuntu Linux.

You’ll find almost anything you need already installed and mostly configured. Just add call sign. If you’re into SDR this is the distribution for you.

DE19 and Digirig

I own a couple of Digirig interfaces. They are very good and I mostly have no trouble. One is running my digipeater (Digipi and Direwolf). But for this project I ran into RF interference. Digirig would lockup with TX on or just freek out flrig. It took a lot of experminting to figure this out.

I purchase a Xiegu DE19 and everything started working. The setting for flrig are: settings

The G90

One trouple is, you can’t work digital unless you are in U-D (upper sideband digital) mode. The G90 will not hear the DE19 unless it is in U-Dl. Flrig doesn’t know about this and will set you to USB so you need to manualy change to U-D.

You will also want to set the G90 to:

  • Long press FUNC
    • AUX IN Volum: 10
    • AUX OUT Volum: 7
  • FUNC / POW
    • MIC GAIN 10
    • INPUT Line
  • NB
    • NB SW OFF

Make a Contact

That’s it. Your ready to make a contact. If you find anything I’m missing please frop me and email and I’ll update this page.

73

Author image

Going DMR

Not your father’s radio!

I’ve started with a couple of new radios for this round of Ham Radio projects.

A Radioddity G90 and their GD-88. As a fan of SDR, I’m using digital modes with both. FT8 on the G90 and DMR on the GD-88. I love the way FT8 cuts through the noise when signal are low.

But I can’t yet say I’m a fan of DMR. It seems like a radio build by a government committee that didn’t know anything about it. Oh… because it was. The process needed to get your DMR radio working is very technical and bureaucratic.

The Radioddity GD-88 is a very nice looking radio with lots of fetchers and good documentation. Radioddity has done an OK to GOOD job on the PC Configuration software.

Getting Started (FM Analog)

A DMR radio, like the GD-88, is NOT your father’s radio. You don’t just “tune” to a frequency, start hearing people. These radios have to be programmed / configured / PLUG-ed.

If you got a GD-88 you should start with the extended manual. The User manual is for option details, Not operations.

Making an Analog Connection

  • Programming Software - This is for my GD-88 and its software.
  • Radio ID - Your radio needs a RADIO Number(ID).
  • Zones (Lists) -These would be getter called lists. You can define their names. (Analog, Digital, HotSpot) They can be loaded and saved as .CSV files.

Software - The GD-88 “Programming Software” runs on Windows. Download it to get started. (For my Linux friends I’ll check if it works with Wind.)

Radio ID - Getting your “Radio ID” is where the bureaucratic BS begins. You’d think call signs would be good enough. NO! You have to register for an ID at RadioID.net. You’ll need to agree with the Privacy Policy, Terms and Conditions, Cookie Policy, and Acceptable Use Policy. Create a RadioID account with your Call sign, email address, a password and the Country you operate in and prove you’re not a robot. RadioID will email you. You’ll need to click on the link in the email to activate your account.

You’ll need an OFFICIAL! PDF copy of your license. If you don’t have the PDF of your License, you can that from the FCC with your FCC registration number and password. When you get logged into the FCC website:

  • Click on “Download Electronic Authorizations”. (left yellow menu, about 1/4 way down)
  • Under “Filter by Radio Service”, select your current call sign and click ADD to “Authorizations to Download”.
  • Click DOWNLOAD alt the bottom right.

Did I say this is technical and bureaucratic? Upload this copy of your license to RadioID and wait. When your request is approved, you should get an email with your Radio ID. My ID is 3196320.

This is enough to get you talking to local analog FM repeaters. Run the DMR_CPS program on your desktop and enter your Call Sign and Radio ID in the Basic Parameters section.
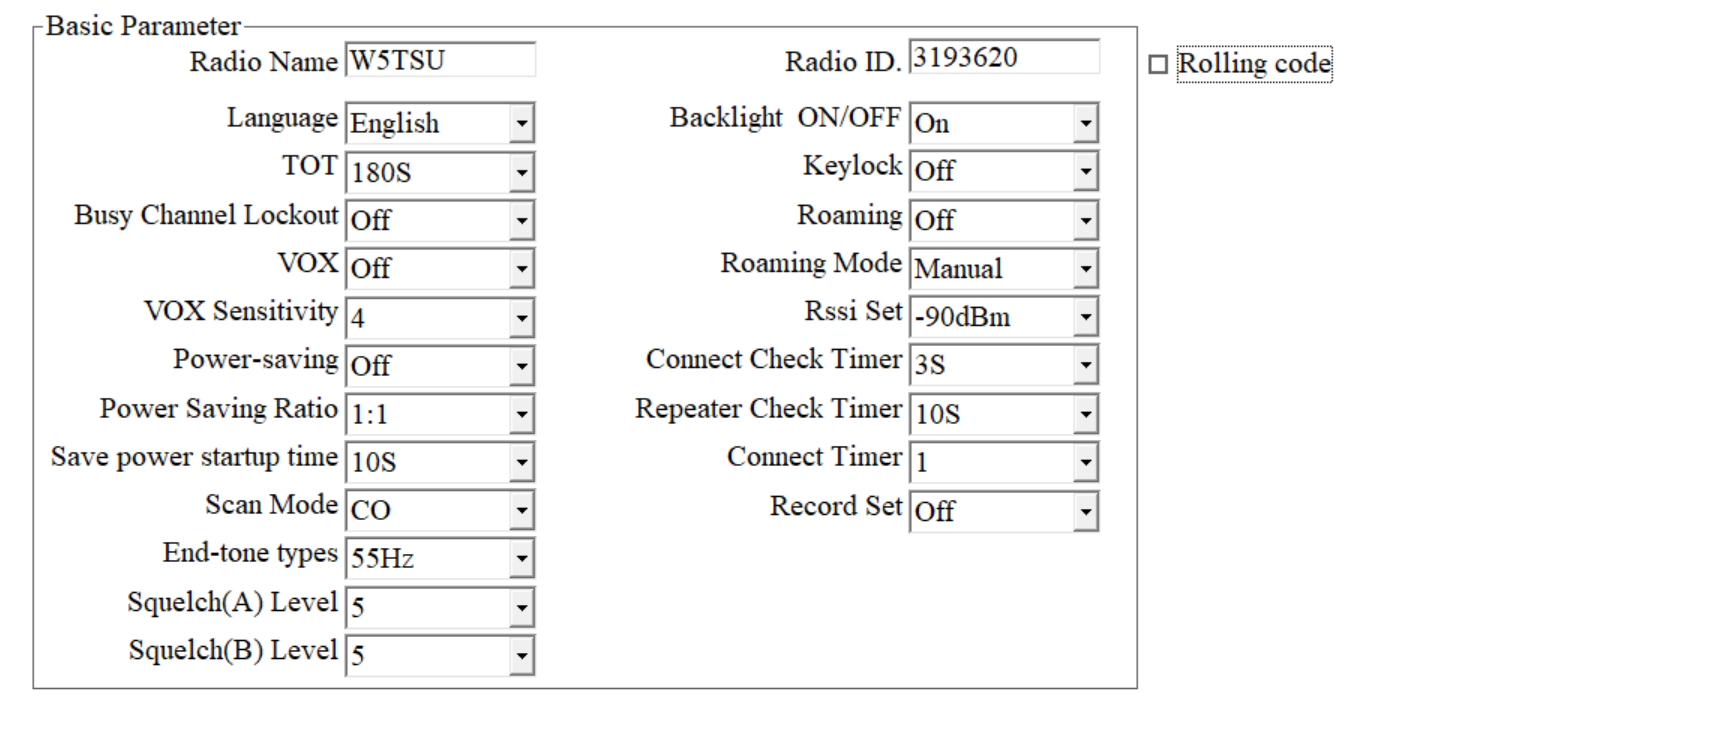
Basic Parameters

ZONES - Create the names of your Zones (Lists) by clicking on the Zones Folder. I created Analog for repeaters in my area, Hotspot for the talk groups I want to use in my hotspot and APRS to work with it. When you expand the Zones folder will see these names.

Zones

Starting with the Analog zone, add your local repeaters. Or, you can create a .CSV file and import the list. See the files section below.
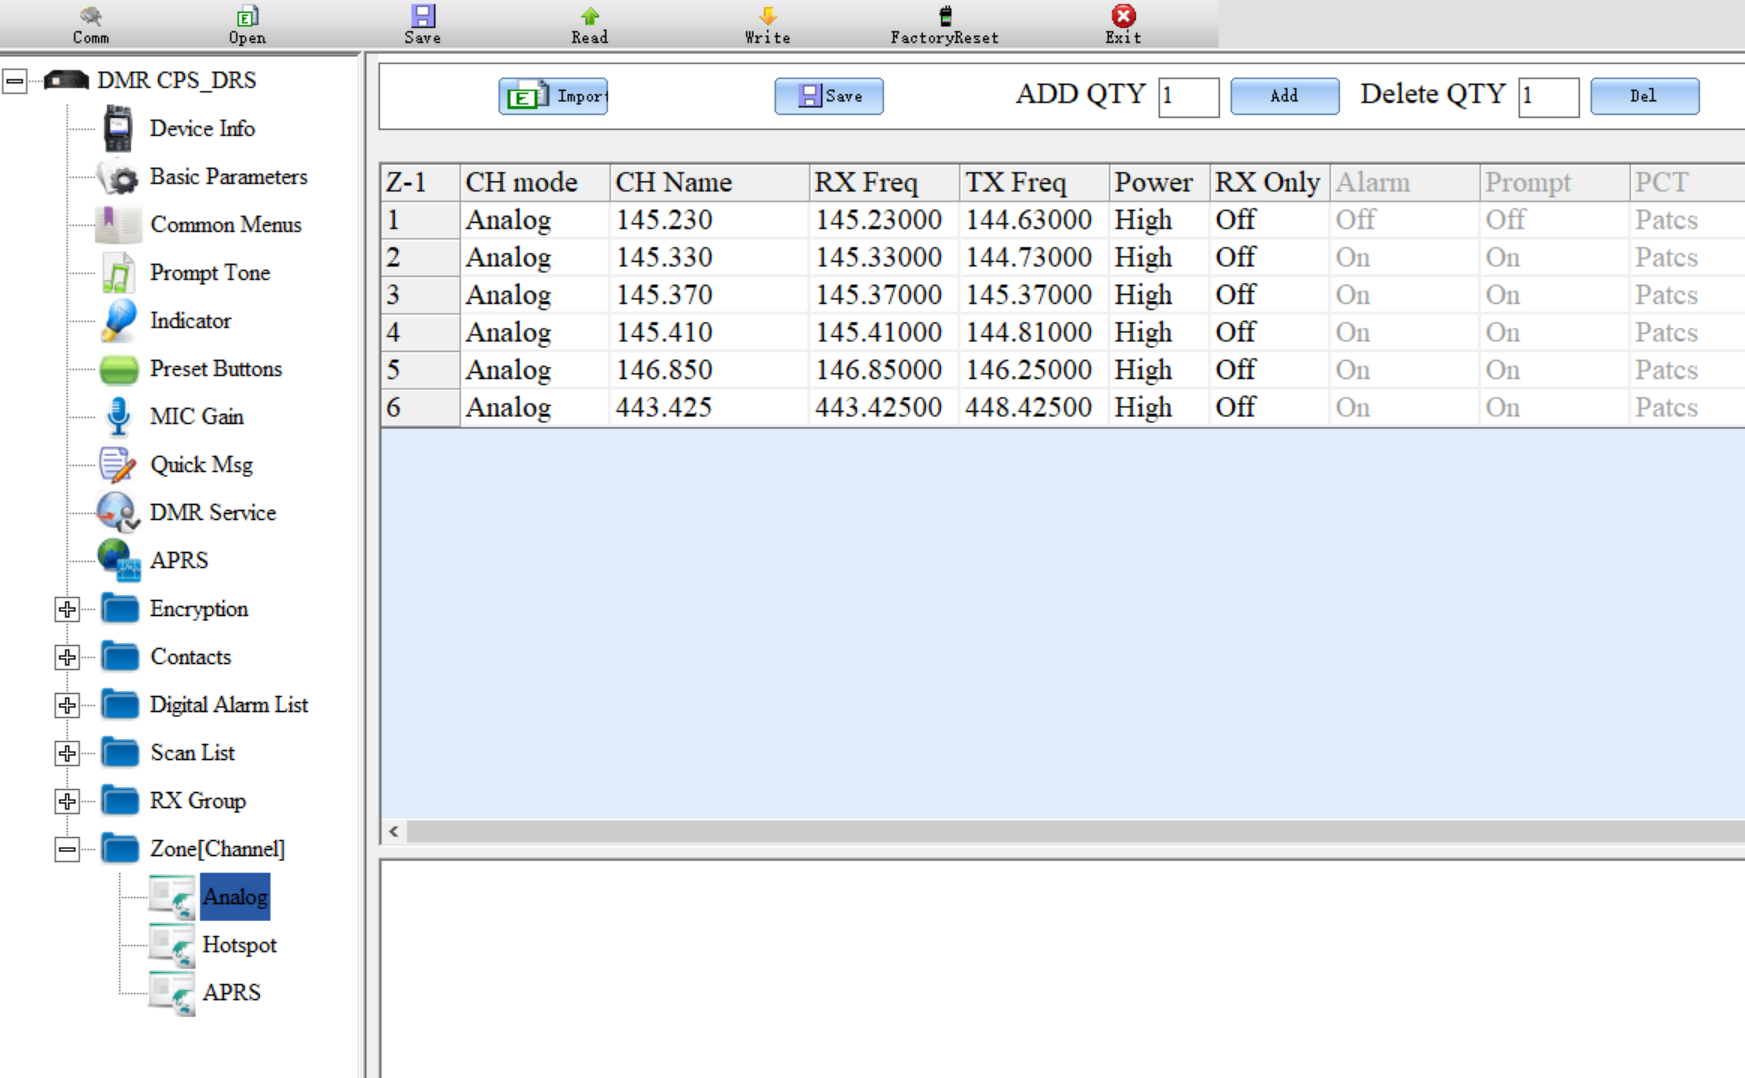
Analog

Plug in the programming cable, select it’s USB device with the Comm button. Select Analog under the Zones menu and import your CSV file. Use the Write button to write your “Plug” to the radio. Unplug the cable to use the radio.

Your radio is ready to use like other Analog FM HTs. Use the “Green” button to select the 01-Analog zone (list) and use the Up/Down or spin the top center knob to select a repeater.

Making a Digital Connection

This gets confusing. This diagram show the dependancies of tables used.

It’s more understandble if you think about about how the Police might use it. Contacts would be an Officer’s assigned radio or a set of partners. Channels are their working groups like Traffic, Invistigation and so on. Zones would be their City or District (North West or Down Town). DD5LP does a good job of explaing this.
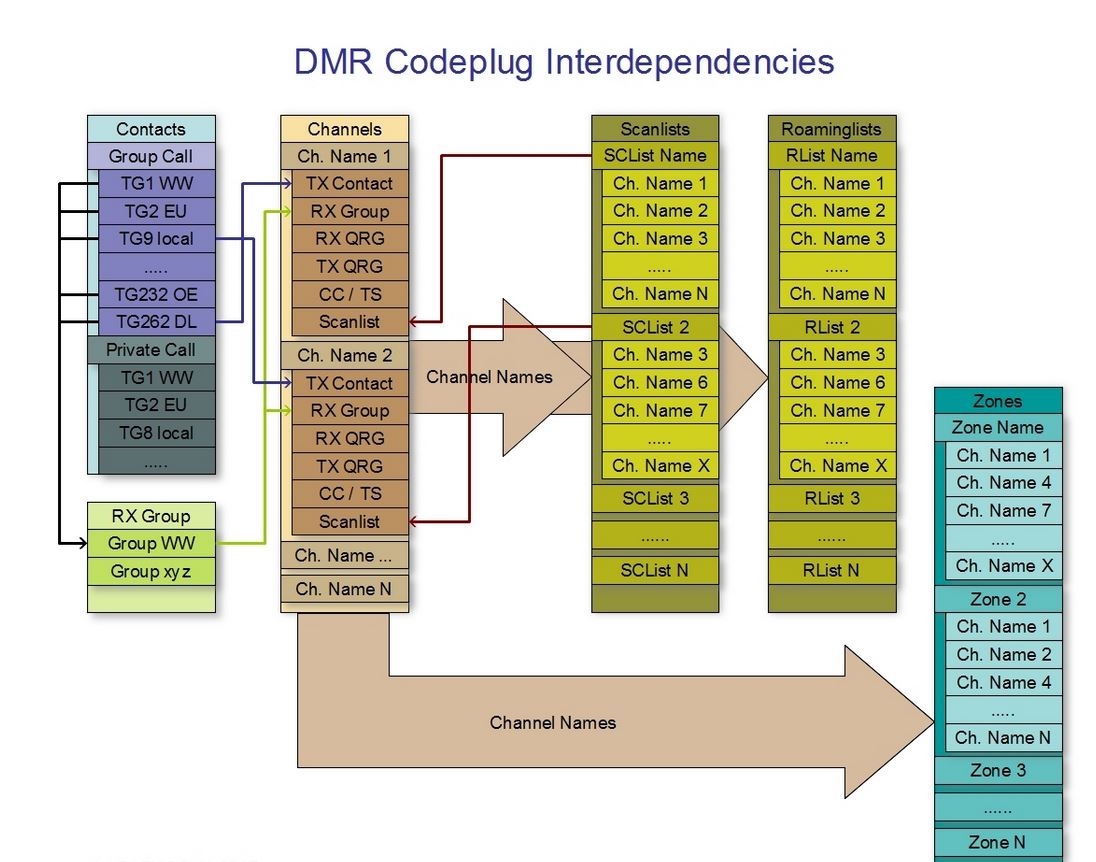
  • Contacts - can be “Private Call” or a “Talk Group”
    • Private Call (Radio ID) - At the time of writing, there are 223,649. The GD-88 hold 300,000.
    • Talk Group - is a conference call.
  • Channels - Digital or Analog.
    • Digital - made of Name, Frequency, offset, which time slot, Color code, which scan list (if appropriate) which receive group list and contact (i.e. the digital contact record which contains the talk group number)
    • Analog - have just Frequency, offset, CTCSS code, which scan list (if appropriate)
  • Zones - Again are lists of channes. A way to group repeaters (channels in DMR terms) together.

To make an RF connections you’ll need: Local DRM Repeaters - You can search this map. Or a HotSpot - I’m using Pi-Star.

You’ll also need some Private Call numbers (Hams) or Group Call numbers (Think Chat Rooms).

You can search for Private Call IDs at RadioID.net. I added four cammas ‘,’ to the end of each line to import this data. I use Linux. The AWK command line for this is…

  awk '{print $0, ",,,,"} user.csv  > [DMR-Hams.csv](https://www.radioid.net/static/files/DMR_Hams.csv)

Repeaters and Hotspots A Hotspot is realy just a personal (low power) digital repeater. Most are simplex and connect to a DMR network on the Internet. A few duplex and so can transmit local signals to a remote repeater. Many of these also can connect to the Internet.

Digital Channels are made with a

  • Name - What is it or what do you want to call it.
  • ID - The Radio ID number of the repeater, hotspot, group or person you will call
  • Frequency - Transmitter frequency - your radio will receive on this
  • Offset - Receive frequency offset.
  • Time Slot - Each frequency is divided into two time slots.
  • Color (1-16) - Think of it as a CTCSS or PL tone. It has many definitions.

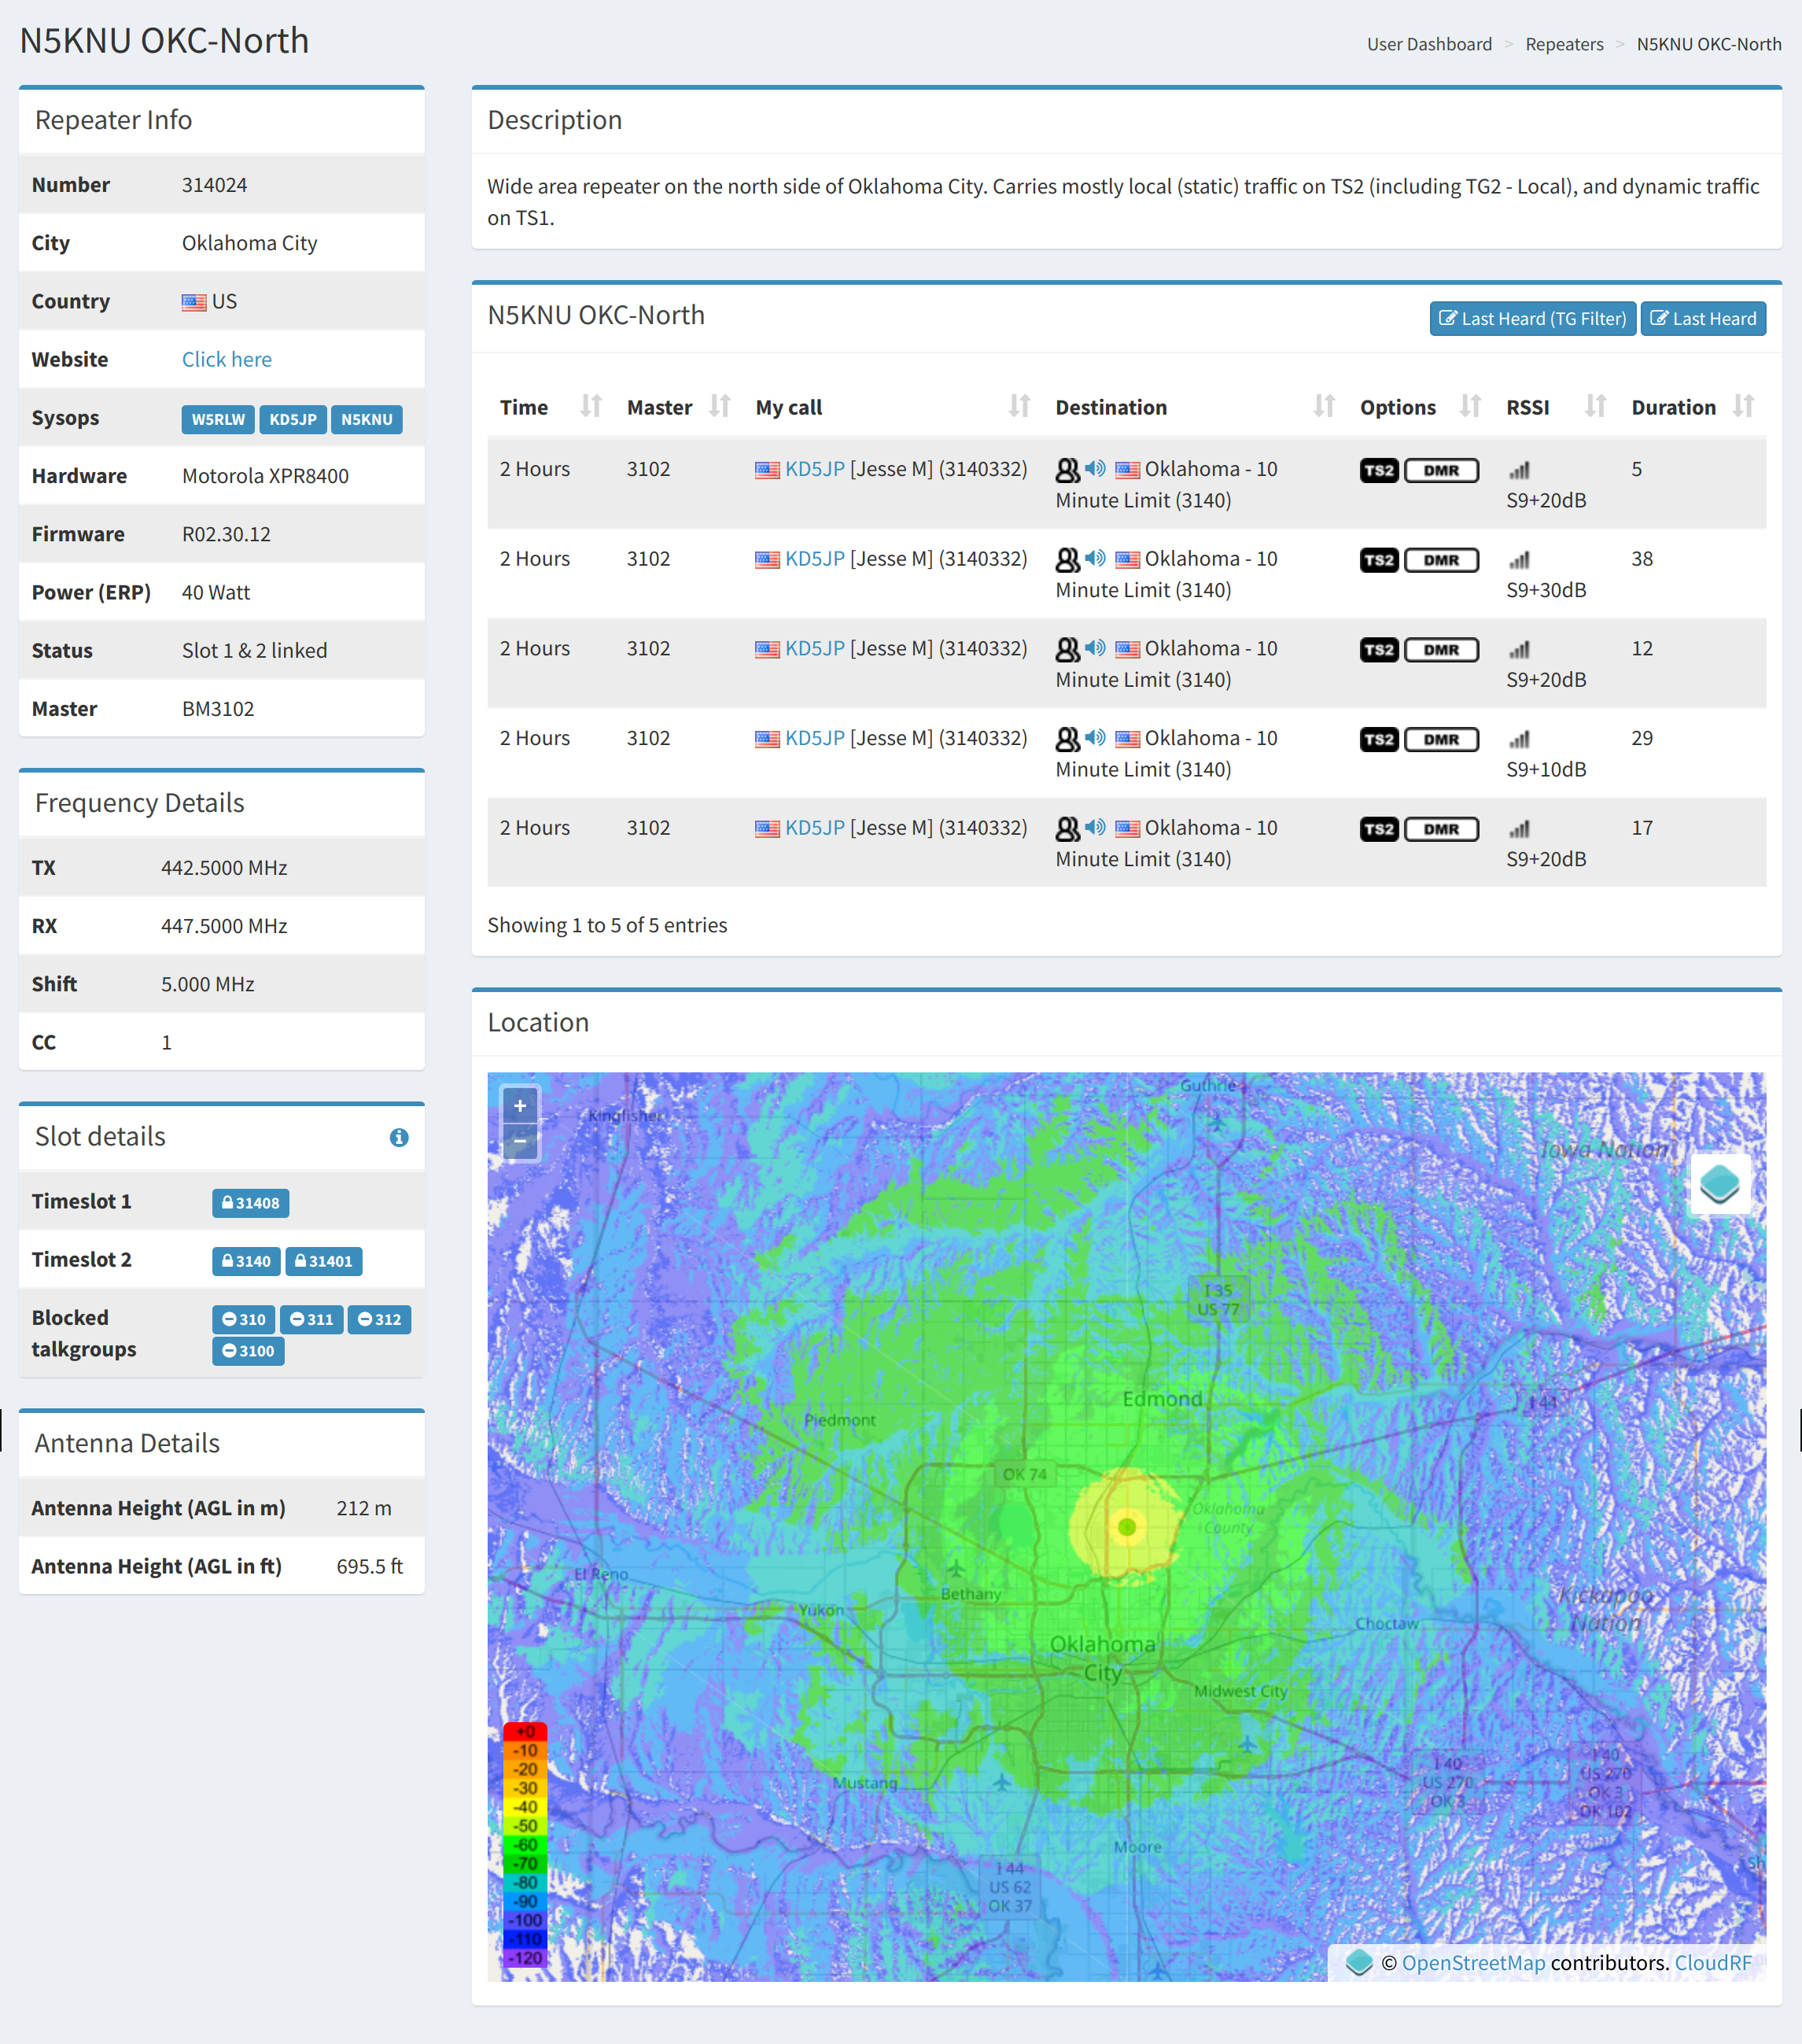
BrandMeister registers Repeaters and HotSpots. Think of it as its own network with centralized (worldwide cluster) of control servers. Although Brandmeister is the largest amateur network of connected repeaters, there are other amateur radio networks of repeaters, like “Anarchy” as well as private networks. Most public service agencies, like police and fire, have private networks. Unless the network owners set it up, users of one network aren’t automatically bridged to the other.

Repeaters can be connected to only one network at a time. So if you are using a Brandmeister connected repeater and your friend is using a repeater connected to Anarchy or some other network, you won’t be able to communicate with each other.

You can find your local repeater on their map.
BrandMeister

Using a HotSpot

I’m using Pi-Star as my HotSpot. I’m not going to explain all the details. I’ll leave that up to some UTube-ers.

Putting it all together Your DMR radio expect you to select a Zone, then a Channel and a Contact.

As I create files for my GD-88 I’ll publish them here. Zone File Channel File Contacts File

Useful Files I’m writing a program to create .CSV files to import into the GD-88. I’m pulling a list of “Local” repeaters from RepeaterBook.com.

UN-TESTED This is my first attempt to create an Analog Zone file for the GD-88. gd-88-repeaters.csv

Other Explinations of DMR DD5LP - https://dd5lp.com/baofeng-rd-5r-dmr-ht/

W5TSU
RepeaterBoot.com

If you need to program your HT for a local area, look no feather than RepeterBook.com.

After creating an account, you can build a list of repeaters based on your location and export it to many common file formats, including Chirp and CSV.

W5TSU

AM broadcast band filter

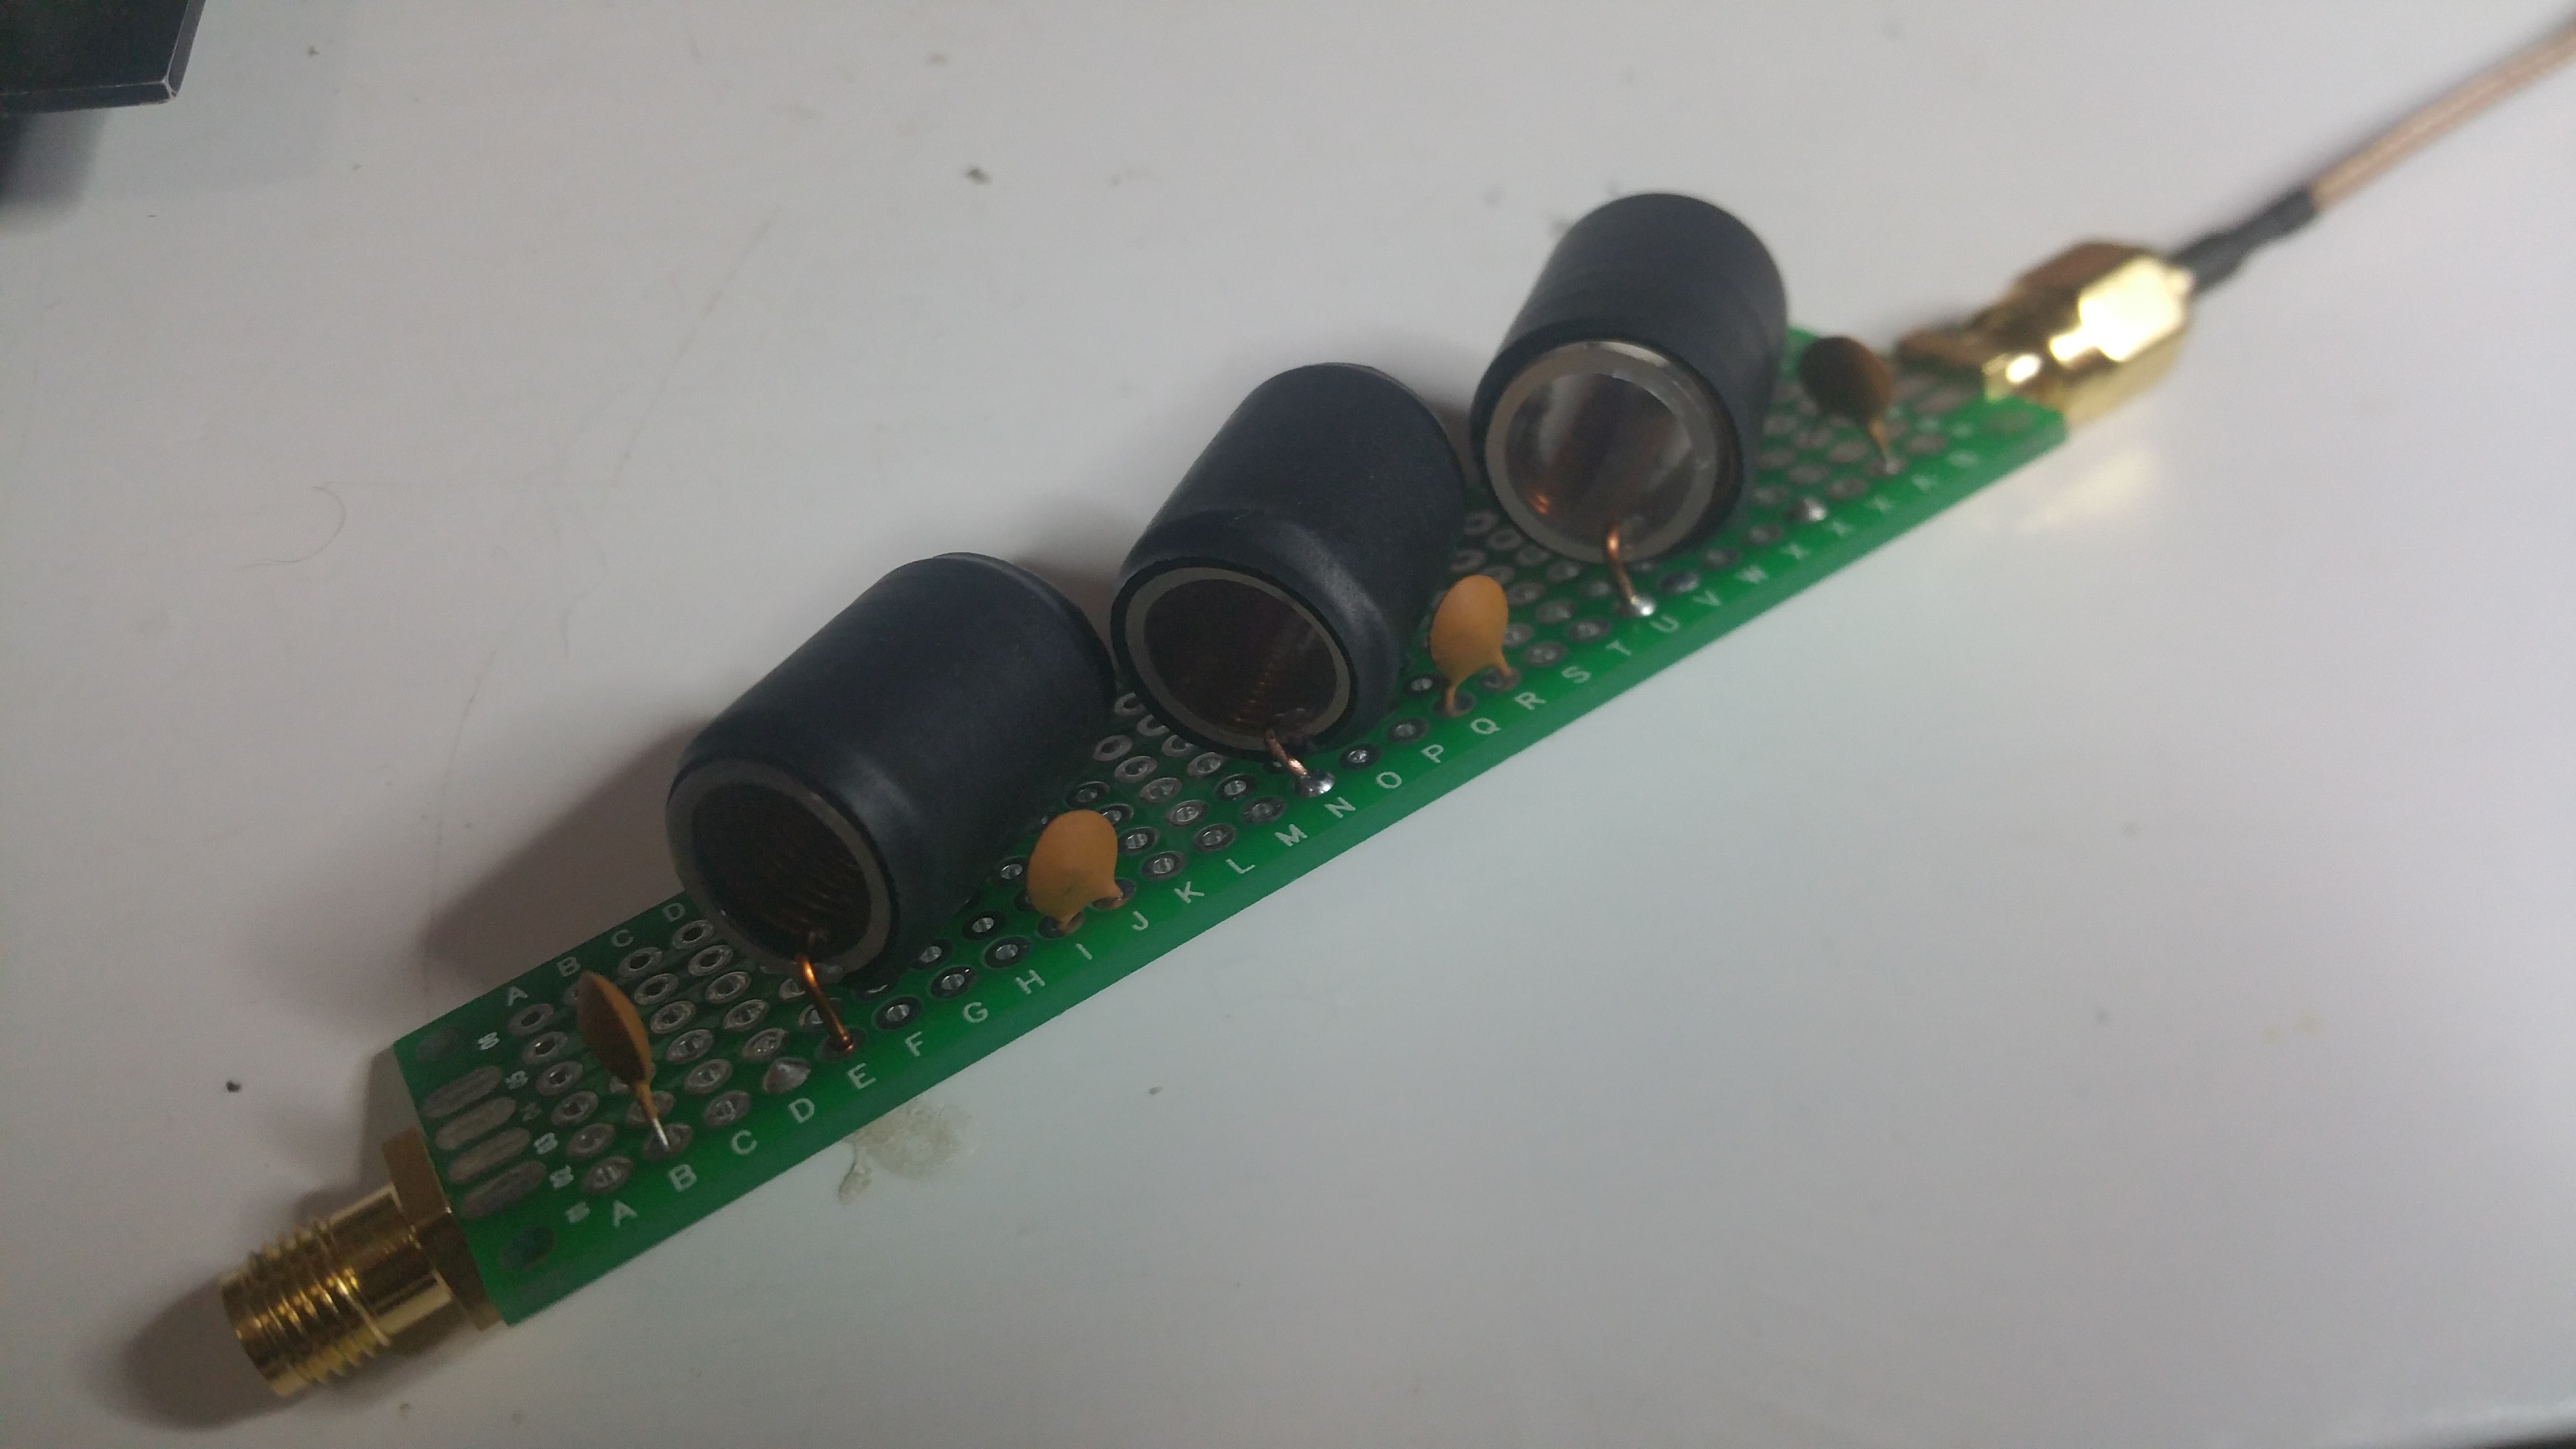
For the W5TSU.net:8030 receiver I build a broadcast band filter. This should front end overload and intermod created by these stations and allow for better Ham band receiption. I also wanted to learn how to build my own coils.

I found a design at the vk3il blog. This filter was modeled with the ELSIE (free version). It is a 7-pole Chebychev filter with cutoff frequencies of 1.7MHz.

Scmatic

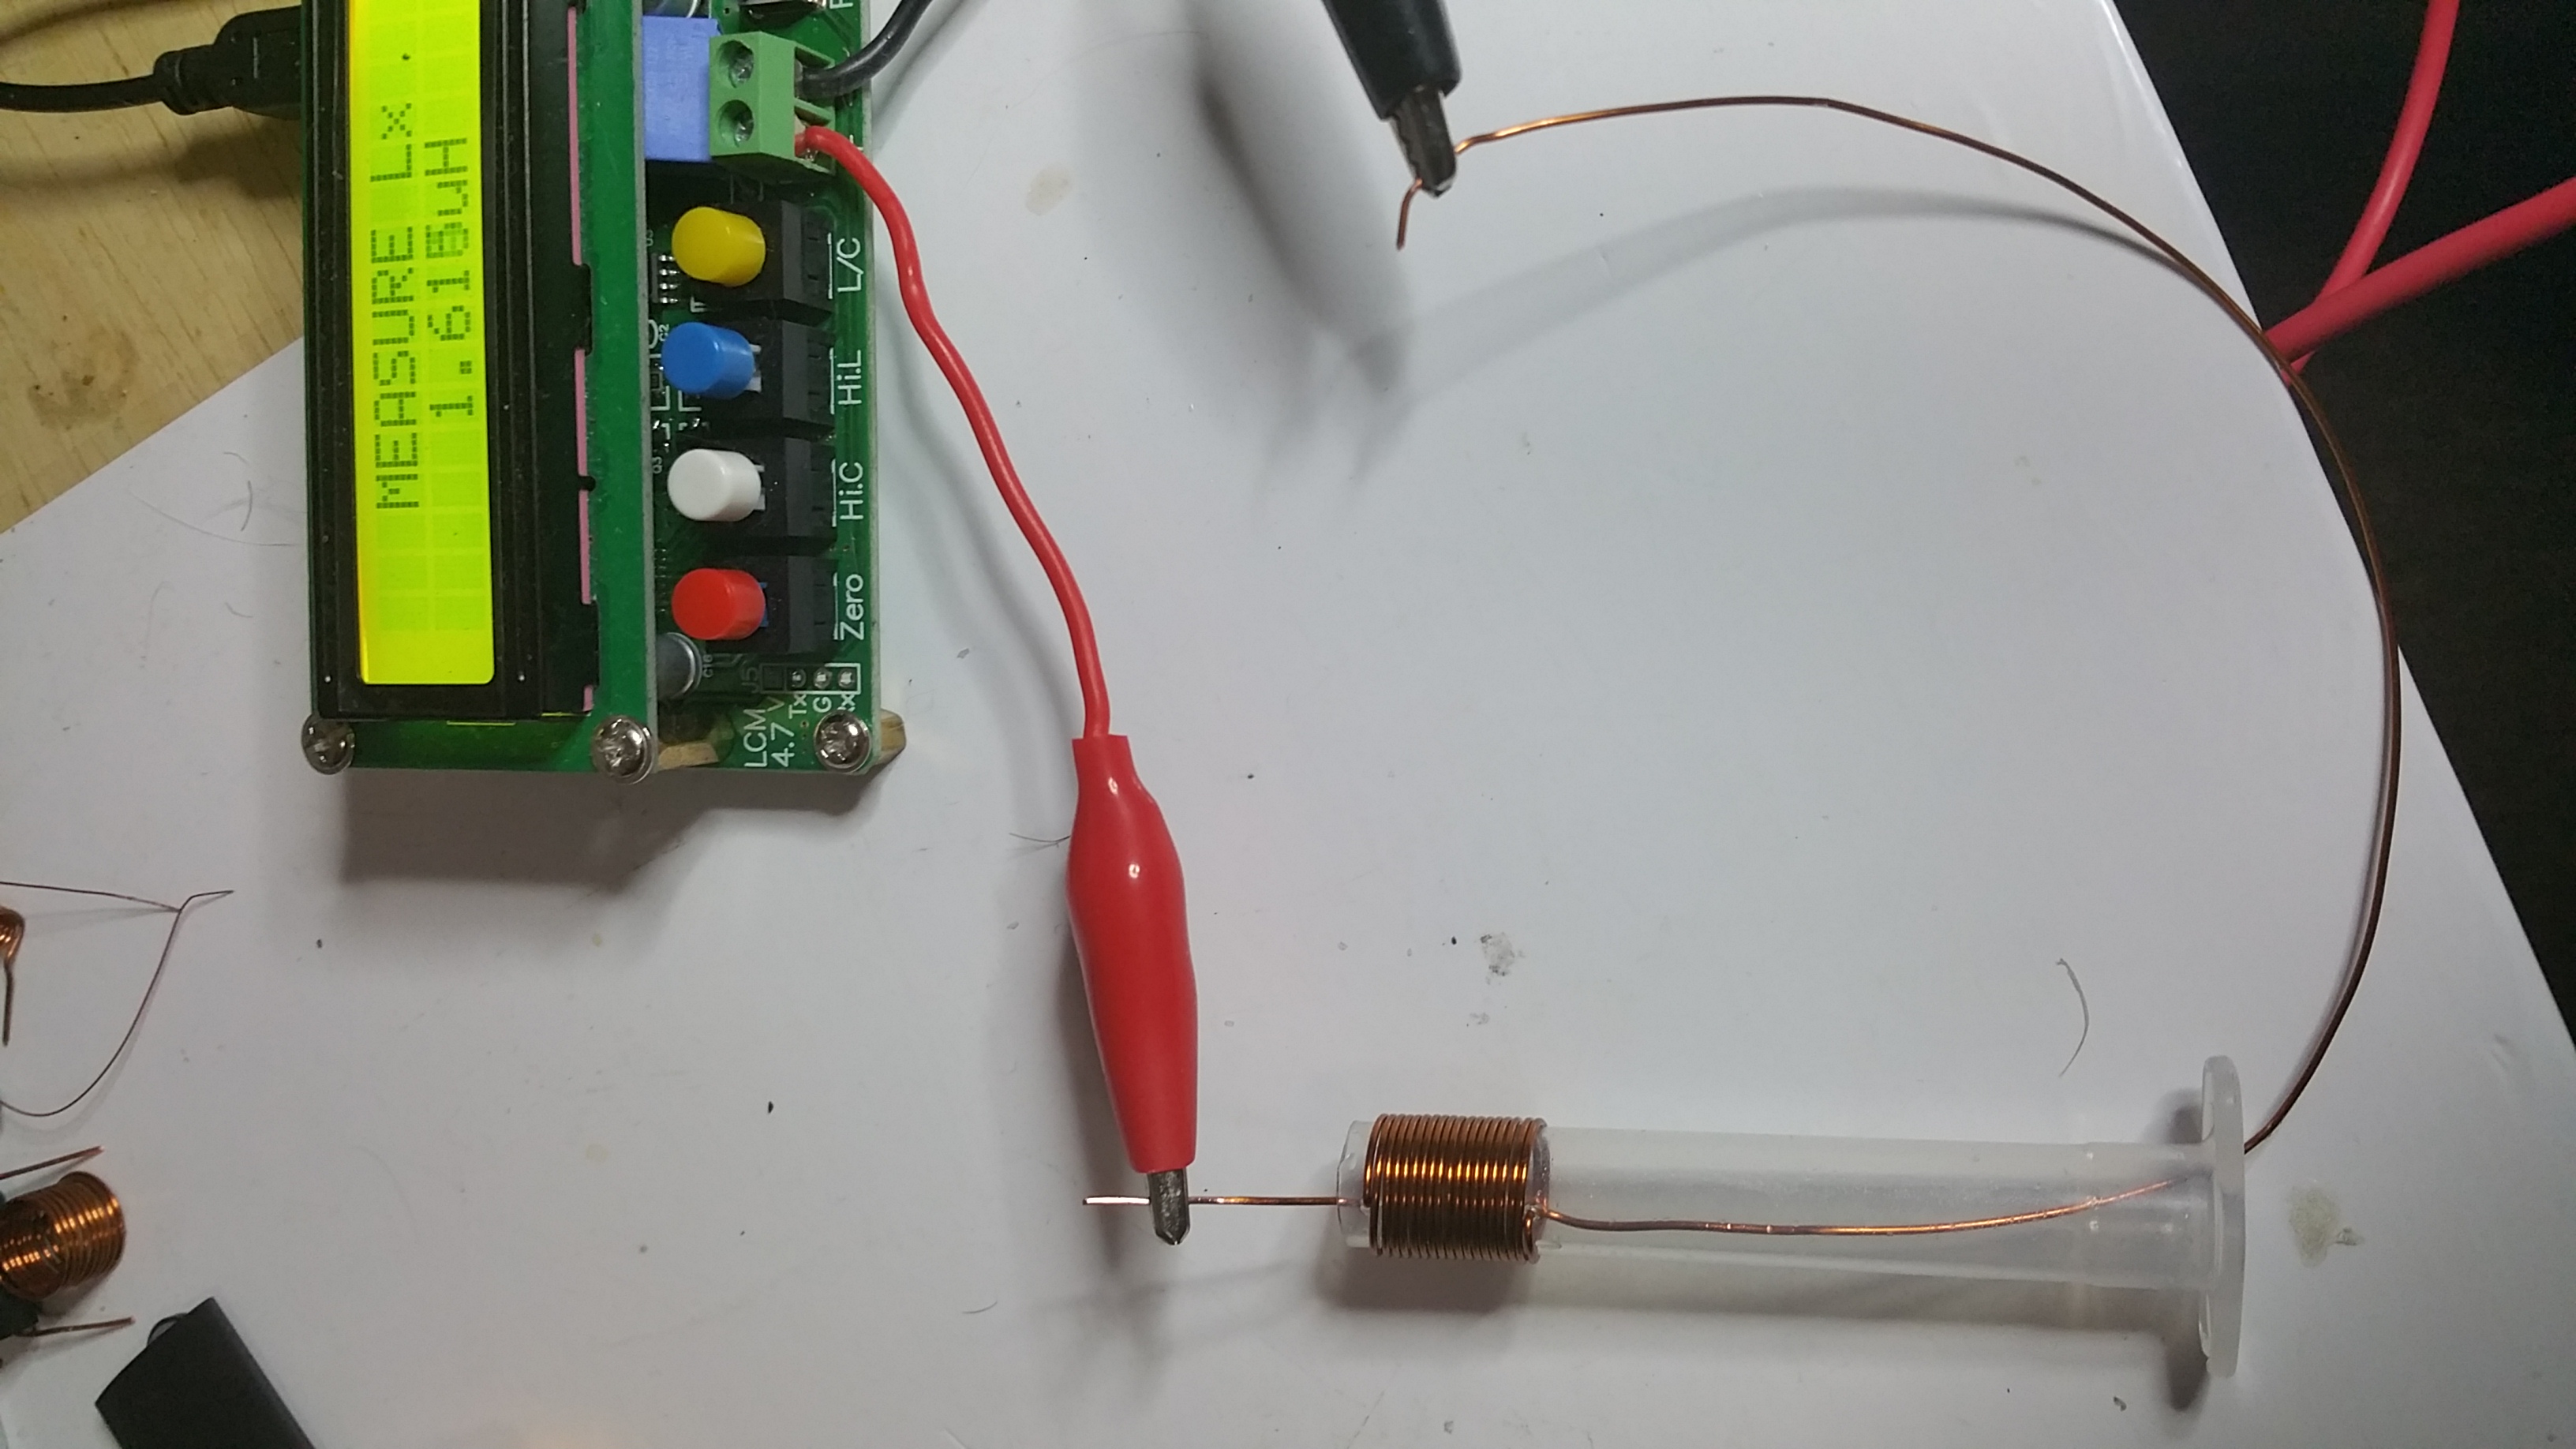
I started by winding some coils from 22, 26 and 30 awg magnet wire. I use a MingHe model LC100-A meter to masure these coils. I found holding the coils with my fingers didn’t make a sizeable different in the coil. What did make a difference was how tight the coile was wound and the lingth of the wire used. The size of the winding did make some difference but not as much as the amount of wire and how stable the winds where.

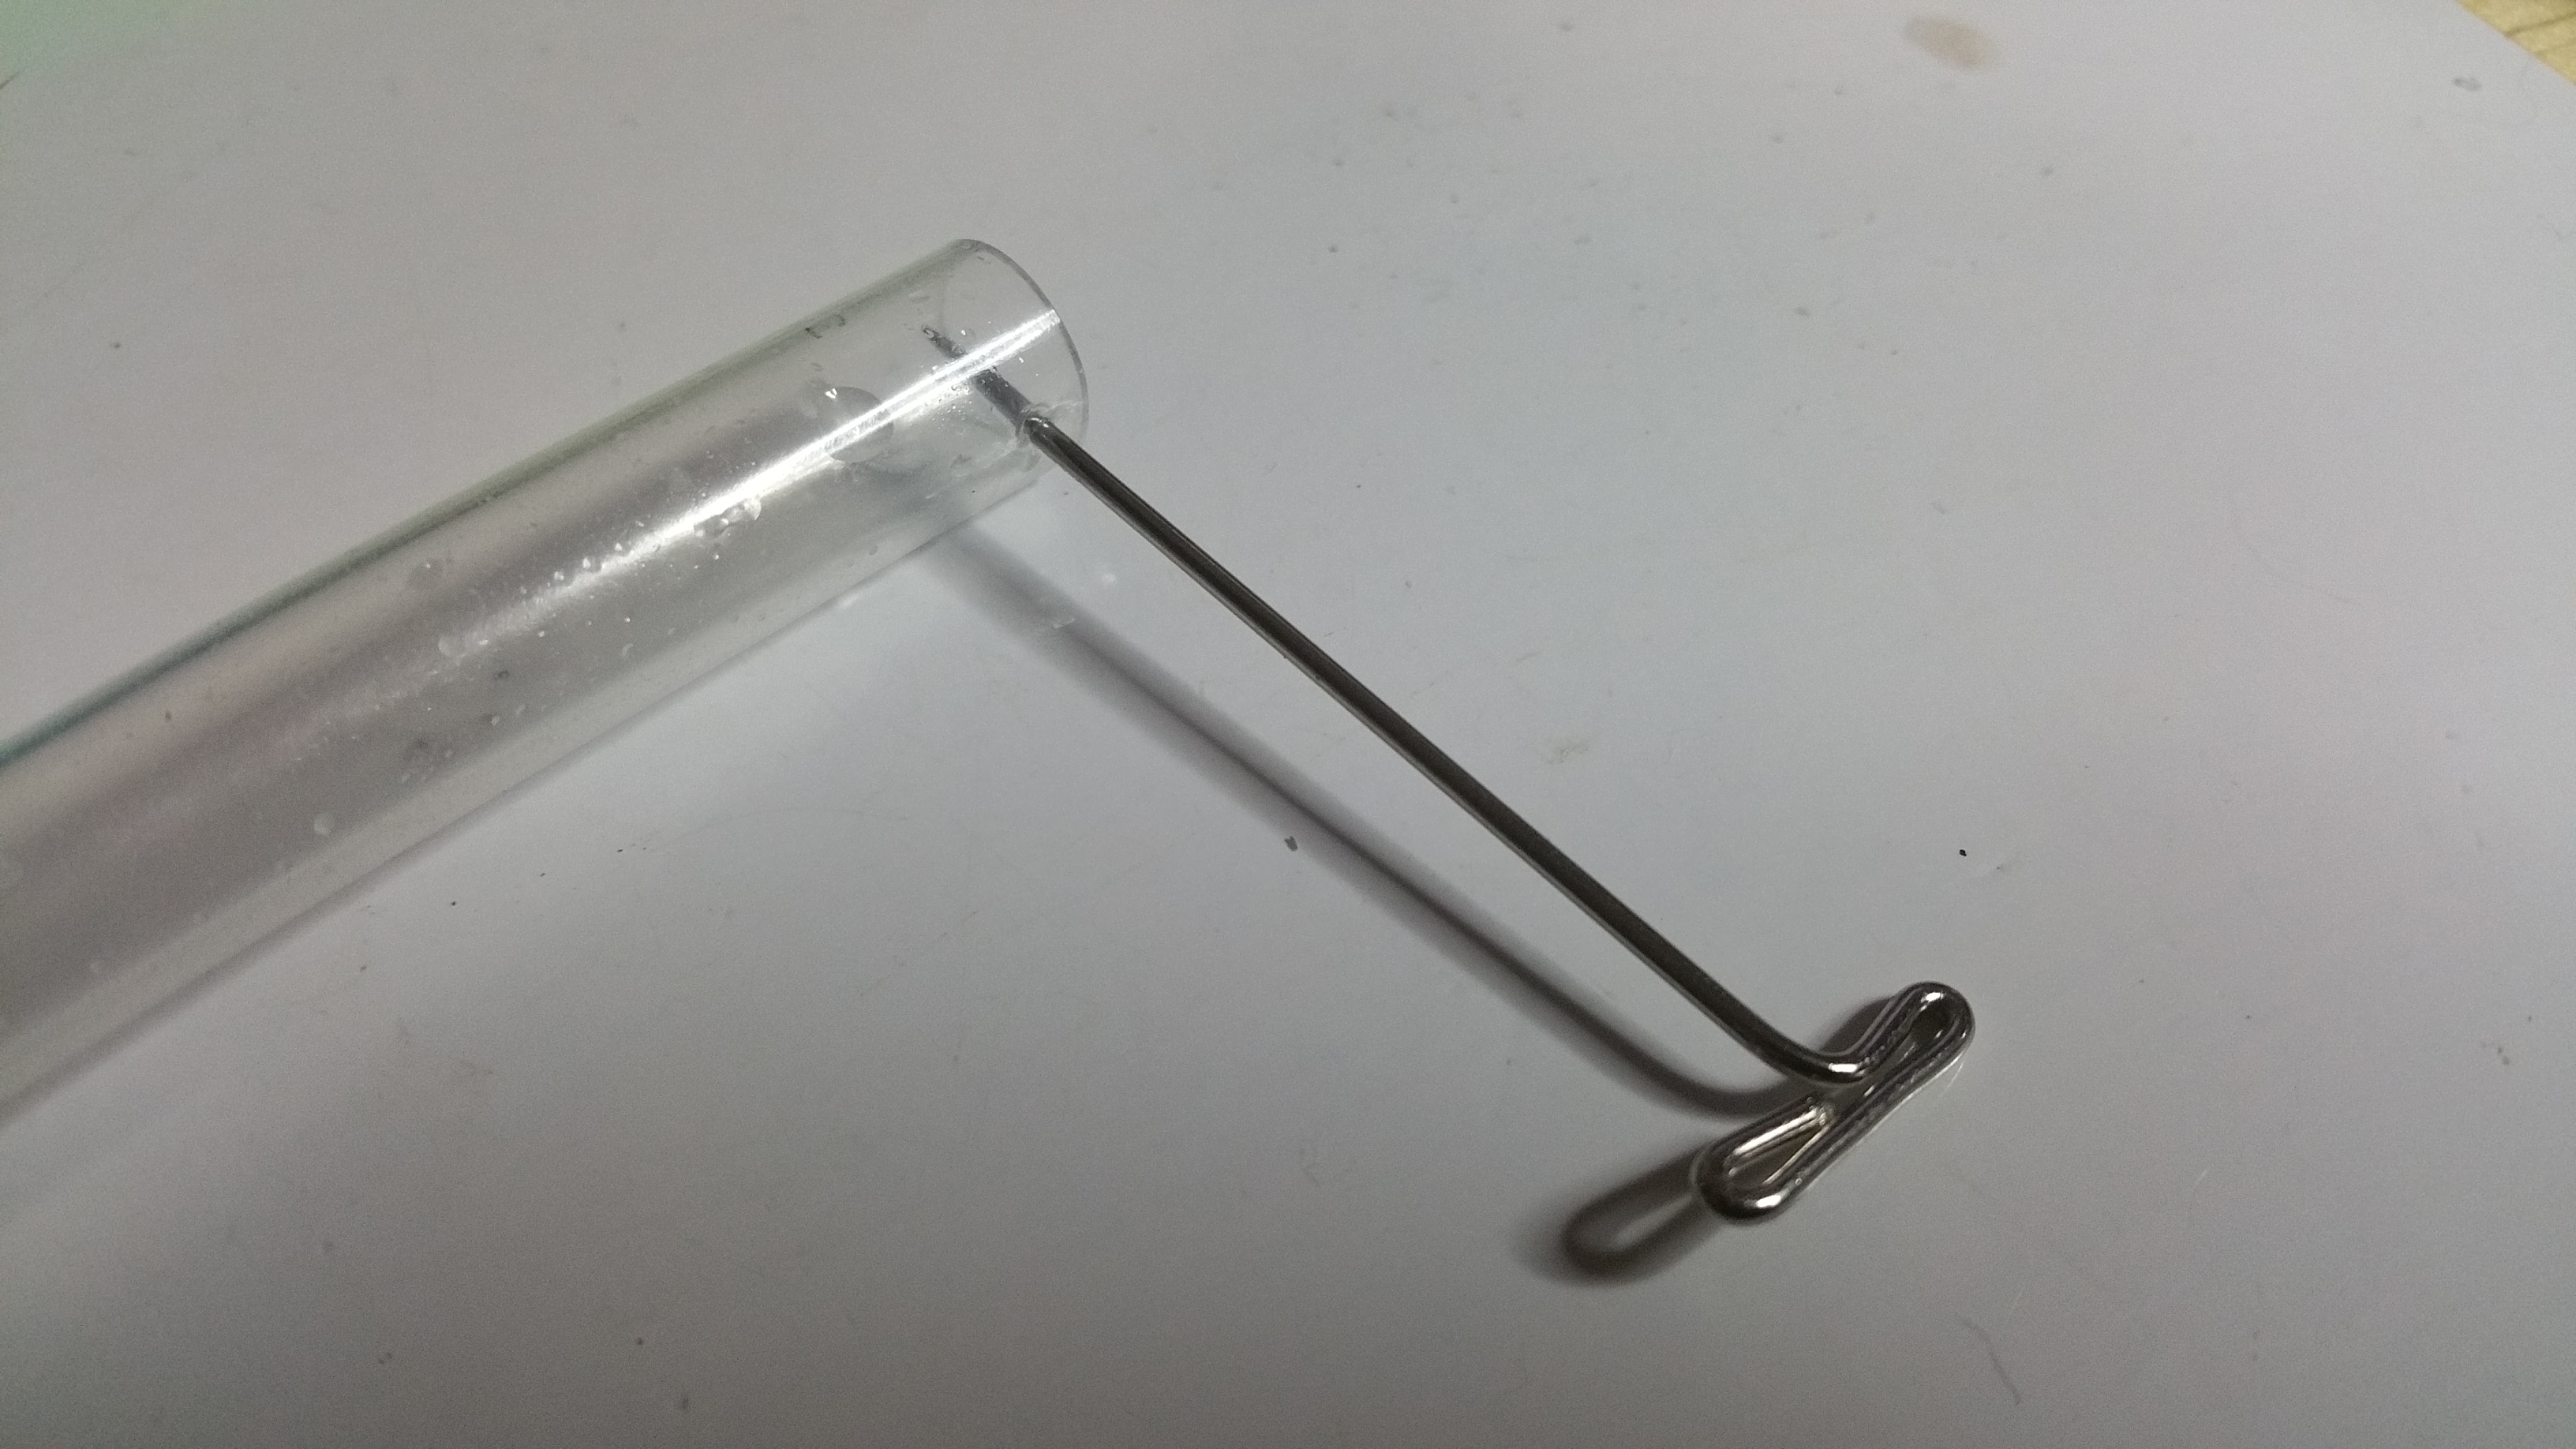
To make my coils I used a thick wall plastic tube. I put a hole with a T pin in the tube and put the 22awg wire through the hole. The wound the wire around the tube. Testing told me less then 20 turns would produce a coil with less then 2uh.

As I wound the wire I would use the LC meter to learn the value. When the value reached the 1.6 or 1.4uh needed I would put another hole in the tube and push the other end of the wire through it. I then secured the coil in place with some heat scrink.

Here are some pictures of the process and the results on the radio.

Coil tube. Whole made with T pin

Coil Measure.

AM broadcast bandfilter

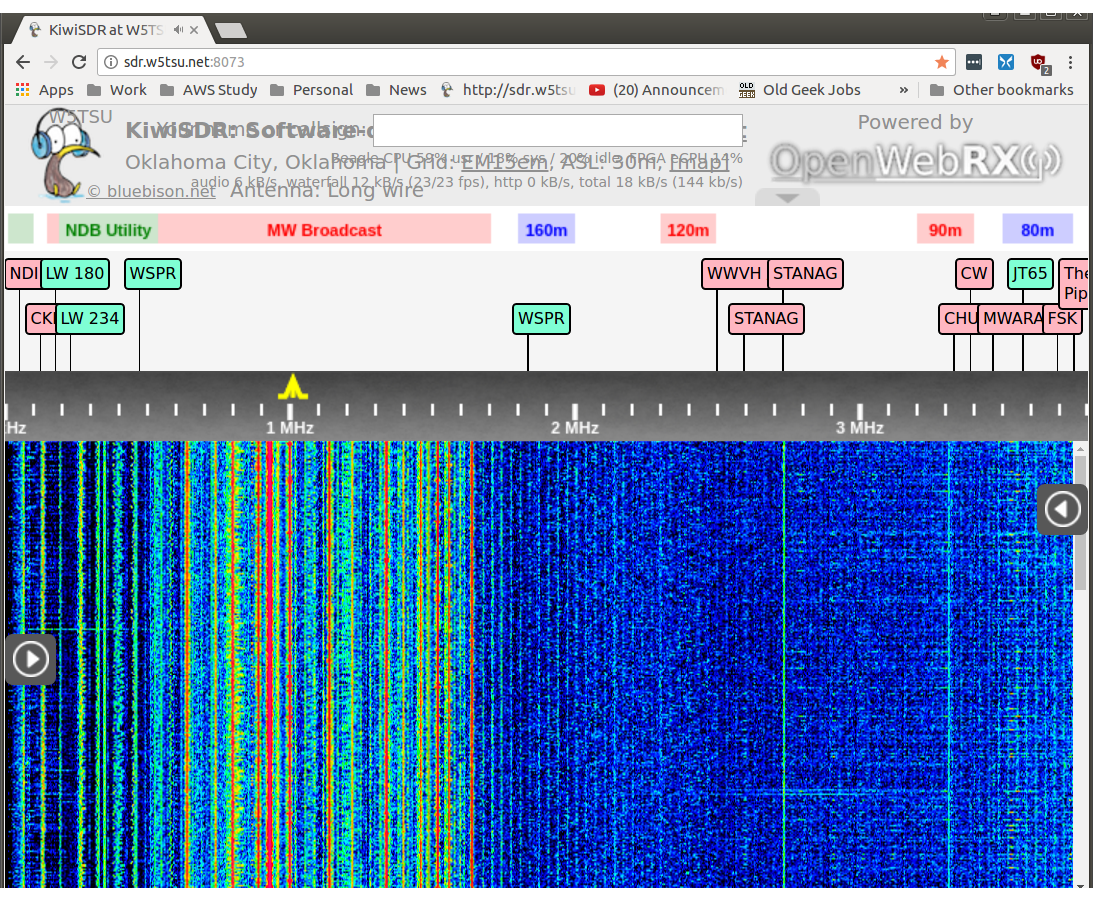
Band before filter

Band with filter

I used 470pf instead of the 560pf caps. The result is a higher cut off frequency. It is 2.9MHz not 1.7MHz. I’ll correct this when I get the correct caps.

W5TSU

APRS Transmitter

I’m working on the design of a APRS Tracker transmitter. The dream is a self contained radio transmitter, modem, and controler with a bluetool connection to a tablet running Xastir.

There are lots of designs and APRS Trackers. Some are almost what I’m looking for. Many are out of date or the designer is dormant. The bigest example is MicroModem. Wounderful design from 2014 but the deveoper is… In his how words… “Long Time, No See”.

The AP510 AVRT5 is exactly what I’m wanting but it has some very bad review.

I purchases a Mobilinkd. It has everything but… GPS for “off line” tracking and Open Source Hardware. Mobilinkd is made to work with APRSdroid. You Android phone or tablet provides the GPS information and the tracking logic. Connects to the modem via BlueTooth and has cable for almost every kind of radio. This is nice buy I ask myself why it is needed at all when APRSDroid also works as a sound card TNC. All you need is a radio with VOX or a VOX curcit to key the radio.

Then there is Tracksoar. This is a very small tracker with gps and radio. It’s all opensource and open hardware. This project is very alive and perfect for a balloon project. But, receive and bluetooth are missing.

Some of these designs use a resistor network and for data pins to output a 16bit sign wave. Others use the pulse width modulation (PWM) out of one pin and a low pass filter. PWM works good and because I uses less data pins this is preferred.

For my build I’m breadboarding with a Arduino Nano, a HC-05 bluetooth and a NMEA compatible GPS. The radio output will be SA818V or DRA818V. The transciver is 1W.

W5TSU

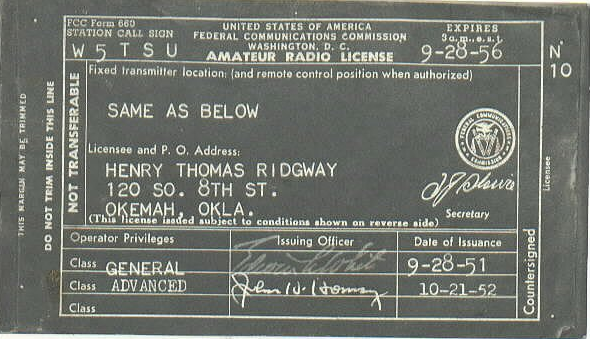
W5TSU started in 1951

This is my grandfather’s ham license from 1952.

Image of W5TSU License 1952

My mother told me stories of her and her father lessioning to the radio. Him teaching her morse code. I picture in my mind, mon sitting on her fathers lap and her talking to some ham on AM.

My mother tough me my name in code when I was five. – .- .-. -.-

W5TSU

New WSPR station

I’m fascinated by the WSPR (http://wsprnet.org) network and found out you can build a transmitter station with an Raspberry Pi.

So, because I have a few Raspbery Pi comptuers setting about doing nothing, it’s time to put one to work. The code for this is at (https://github.com/JamesP6000/WsprryPi). WSPR net has some documentation on it (http://wsprnet.org/drupal/node/5353). The output from the RaspPi is a square wave so lots of filter is needed. (http://www.gqrp.com/harmonic_filters.pdf). A kit is avaible at (http://www.kitsandparts.com/univbpfilter.php).

I also have a HackRF. I’m thinking I could use it to receive WSPR stations on a schedule. May take some work.

W5TSU